Guide on How to Extend Patio with Pavers
The decision to extend patio with pavers is a great solution for transforming a multi-purpose area without breaking the bank. This can enhance your outdoor living space, increase the value of your home, and create a versatile entertainment area.
In this post, we will guide you through the process of extending your patio with pavers. You will learn how to plan your paver patio extension project meticulously, from choosing the right pavers that suit your aesthetic and functional needs to designing a layout that complements your existing space.
The Benefits of Extending Your Patio with Pavers
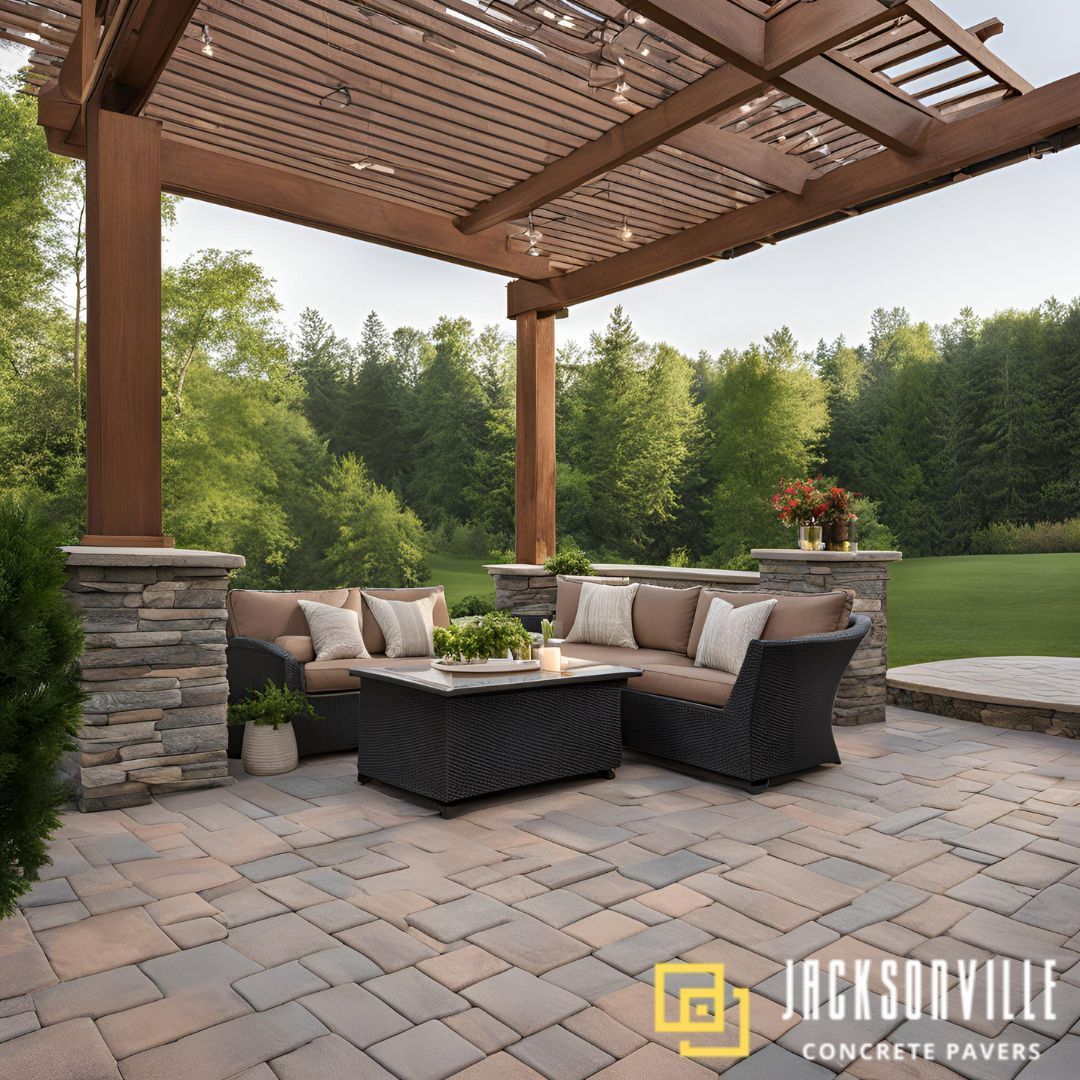
Extending your patio with pavers is not just about adding space; it's about transforming your home's outdoor area into something special. Whether it's for enhancing your outdoor living experience, boosting your home's value, or creating a dynamic space for entertainment, pavers offer a practical and stylish solution. Let’s take a look at the key reasons why extending your patio with pavers can be a game-changer for your home.
Enhance Your Outdoor Living Space
Creating a beautiful outdoor living space is a great way to enhance the aesthetics of your home and increase its curb appeal. It provides a functional and comfortable area for entertaining or relaxing with family and friends.
With the right design choices, such as selecting appropriate plants and materials, you can achieve an outdoor oasis that meets your specific needs and preferences. Patio landscaping is also a low-maintenance option that saves time and money compared to traditional lawn care.
Increase the Value of Your Home
Choosing to extend your patio with pavers is a wise investment that can significantly enhance the value of your home. Although the initial installation cost might be higher than using other materials, the long-term benefits in terms of maintenance and repairs are substantial.
Pavers add a timeless appeal to your property, boosting its curb appeal and potentially increasing the resale value. This extension is more than just an aesthetic upgrade; it adds a functional and attractive element that is often sought after by potential buyers. For a personalized estimate and to explore the benefits of extending your patio with pavers for your driveway, patio, or walkway, feel free to contact us.
Create a Versatile Entertainment Area
A patio extension can transform your outdoor space into a versatile entertainment area. Whether you enjoy hosting parties, barbecues, or simply spending time with family and friends, a well-designed patio can provide the perfect setting.
You can create different zones within your patio, such as a dining area, a lounge area, and even a built-in bar. This allows you to accommodate various activities and provides flexibility for different types of gatherings. With the right furniture, lighting, and decor, you can create an inviting and comfortable space that will impress your guests.
Planning Your Patio Extension
Assessing Your Space and Needs
When it comes to extending your patio with pavers, it's important to assess your space and needs. Think about how you plan to use the space, whether it's for entertaining, dining, or lounging.
This will help you determine the size and layout of your patio extension. Additionally, consider the overall style of your home's exterior and choose a theme that complements it. Incorporating different elements such as plants, hardscaping, and lighting can create a visually appealing patio landscape.
Remember to find the right balance between functionality and aesthetic appeal. To guide your decision-making process and prevent overspending, create a design framework and gather all the necessary tools and materials.
This includes shovels, rakes, a wheelbarrow, pavers, gravel, sand, and landscaping fabric. By carefully assessing your space and needs, you can create a patio extension that enhances your outdoor living experience and adds value to your home.
Suggested Reading: DIY Patio Pavers: A Step-by-Step Guide for Beginners
Choosing the Right Pavers
When it comes to outdoor patio paver ideas for your hot tub, selecting the right pavers is a critical decision that significantly impacts the patio’s durability and visual appeal. With a myriad of options available, it’s essential to consider several factors before making your choice.
Material: Pavers are available in various materials, including concrete, natural stone, and clay brick. Each material offers distinct benefits in terms of durability, maintenance, and aesthetic appeal. Concrete pavers are a popular choice due to their affordability and versatility, while natural stone pavers exude a timeless elegance and unique character. Clay brick pavers are renowned for their rich, earthy tones and classic charm.
Size and Thickness: Consider the size and thickness of the pavers based on the anticipated load of the hot tub and the foot traffic in the surrounding area. Thicker pavers are better suited for supporting heavy loads and are often recommended for hot tub installations. Additionally, the size of the pavers can influence the overall visual impact of the patio.
Color and Texture: The color and texture of the pavers play a crucial role in achieving the desired aesthetic for your patio. Consider the existing color palette of your outdoor space and the overall design aesthetic you wish to achieve. Select pavers that complement the style of your home and landscape.
By meticulously planning and preparing for the construction of your paver patio, you’ll lay a solid foundation for a successful and visually stunning addition to your outdoor space.
Determining the Layout and Paver Patio Designs
When determining the layout and design of your patio extension, there are a few key factors to consider. First, think about the size and shape of the pavers you want to use. This will help you determine the overall look and feel of your patio. Next, consider the direction of the pattern. Do you want a traditional running bond pattern or something more unique like a herringbone layout? Finally, think about any accent pieces or borders you may want to include. These can add visual interest and help define the space. Take some time to sketch out your ideas and create a layout plan using pencil and paper or design software. This will give you a clear vision of your patio before you start the paver patio installation process.
Preparing the Area
Getting your space ready for paver installation ensures your patio is well-built and lasts for years. Let’s take a look at these essential steps to prepare the area.
- Clearing and Leveling the Ground: Before you can start installing your patio pavers, you need to clear and level the ground. This phase involves clearing the area, marking the layout, and addressing any potential drainage issues to ensure the stability and functionality of the patio.
- Marking the Patio Area: Once you have assessed your space and determined the layout and design of your patio extension, the next step is marking the patio area. This phase involves clearing the area, marking the layout, and addressing any potential drainage issues to ensure the stability and functionality of the patio.
- Excavating the Soil: To excavate the area, start digging within the marked area using a shovel. Remove the top layer of grass, soil, and any other debris until you reach the desired depth. The depth will depend on the thickness of the pavers, plus the thickness of the base material.
Installing Patio Pavers
Laying the Base Material
With the marked and excavated area ready, it’s time to apply the base material to create a stable foundation for your paver patio. The base material provides support, helps with drainage, and prevents the pavers from shifting over time. Follow these steps to apply the base material:
- Add a layer of gravel: Start by adding a layer of gravel to the excavated area. This coarse material acts as a stable base and aids in drainage. Spread the gravel evenly, using a rake or shovel to level it out.
- Compact the gravel: Use a plate compactor to compact the layer of gravel. This will ensure that it is tightly packed and provides a solid foundation for the pavers. Go over the area multiple times, making sure to cover the entire surface.
- Add a layer of sand: After compacting the gravel, add a layer of sand on top. The sand allows for fine adjustments and leveling of the pavers.
By properly applying the base material, you are laying the groundwork for a sturdy and long-lasting paver patio.
Setting the Pavers
Now comes the exciting part of actually laying the pavers and bringing your patio to life. This step requires careful attention to detail and precision to ensure a beautiful and long-lasting outcome. Follow these steps to properly lay the pavers:
- Start from a straight edge: Begin laying the pavers from a straight edge, such as a wall or an existing structure. This will serve as your reference point and help maintain a straight and aligned pattern.
- Place the first paver: Position the first paver in the desired orientation and gently press it into the sand or base material. Use a rubber mallet to tap it into place, ensuring that it sits level and flush with the surrounding edge restraints.
- Add more pavers: Continue placing the pavers one by one, working from the first paver in a pattern of your choice. Leave a small gap, typically around 1/8 to 1/4 inch, between each paver to allow for joint sand and accommodate any expansion or movement.
- Check for level and alignment: Regularly use a level to ensure that the pavers are level and aligned with each other. Make any necessary adjustments as you go.
- Fill gaps with joint sand: Once all the pavers are in place, fill the gaps between them with joint sand. This will stabilize the patio, prevent weed growth, and enhance the overall appearance.
- Compact the pavers: Finally, use a plate compactor or a rubber mallet to gently compact the pavers into the base material. This will ensure a solid and stable patio surface.
For insights, read more about edge pavers.
Cutting and Fitting the Pavers
When it comes to laying a paver patio, you’ll inevitably encounter areas where full-sized pavers won’t fit perfectly. This is where cutting and fitting pavers becomes necessary to ensure a seamless and professional-looking finish.
Finishing Touches for Paver Patios
After meticulously laying your pavers, the final steps are crucial to ensure the longevity and beauty of your patio. Applying joint sand, edging the patio, and sealing the pavers are key to maintaining stability and adding the finishing touches to your project.
- Applying Joint Sand: Once you have laid the pavers and the base material is set, it's time to apply joint sand to the gaps between the pavers. This step not only improves the appearance of your patio but also helps maintain stability.
- Paver Patio Edging: Installing edge restraints is a crucial step to ensure the longevity and stability of your patio. Follow these steps to properly install edge restraints:
- Choose the right type of edge restraints: There are various options available for edge restraints, including plastic, metal, or concrete. Consider the style and design of your patio, as well as the expected traffic and load, when selecting the appropriate type of edge restraints.
- Prepare the perimeter: Before installing the edge restraints, make sure the perimeter of the excavated area is clean and free of debris. Use a pressure washer or a broom to remove any dirt or loose material.
- Place the edge restraints: Start by placing the edge restraints along the perimeter of your patio. Ensure they are positioned flush against the outer edge of the compacted base material. Align them straight and secure them in place using stakes or spikes.
- Check for straightness: Use a string line or a straight edge to check the alignment of the edge restraints. Make any necessary adjustments to ensure they are perfectly straight and in line with your patio design.
- Secure the edge restraints: Once you are satisfied with the placement and alignment of the edge restraints, secure them firmly in place by hammering stakes or spikes through the pre-drilled holes. Space the stakes at regular intervals to provide adequate support.
- Double-check the level: Use a level to ensure that the edge restraints are level and at the desired height. Adjust the stakes or add/remove base material if needed to achieve a
- Sealing the Pavers: Sealing your paver patio is an optional but beneficial step that can enhance the appearance, longevity, and durability of the surface. The sealer acts as a protective barrier, preventing stains, inhibiting weed growth, and providing resistance to harsh weather conditions.
Suggested Reading: Choosing the Right Pavers Sealer for Your Home: The Ultimate Guide
At Jacksonville Concrete Pavers, we provide expert patio paver installation and final touches that make your concrete project stand out. We have the expertise to add that extra touch of beauty to your concrete surfaces.
Our team of professionals in Jacksonville, FL is dedicated to delivering high-quality concrete finishing services that exceed your expectations. Contact us today to discuss your project and let us bring your vision to life.
Conclusion
Throughout each stage of this process, from initial planning and preparation to the final sealing of the paver patio, your dedication, and hard work have culminated in a durable and visually appealing result.
However, it is highly recommended to consult with us at Jacksonville Concrete Pavers for professional expertise and peace of mind. Our skilled team can ensure that your patio extension is executed flawlessly, guaranteeing a beautiful and enduring addition to your home.
With us, you can sit back, relax, and cherish your newly transformed outdoor space, a perfect setting for creating lasting memories.
Frequently Asked Questions
What are the benefits of extending your patio with pavers?
Extending your patio with pavers can enhance your outdoor living space, increase the value of your home, and create a versatile entertainment area.
How do I choose the right pavers for my patio extension?
When choosing pavers, consider factors such as style, color, size, and material. It's important to select pavers that complement your existing outdoor space and meet your functional needs. You can contact us to give you professional advice on which paver is appropriate for your patio extension needs.
What is the process of excavating the soil for a patio extension?
Excavating the soil involves clearing and leveling the ground, marking the patio area, and removing the top layer of soil. This step creates a stable base for the pavers.
How do I properly lay the base material for my patio extension?
To lay the base material, start by applying a layer of gravel or sand and compacting it to create a solid foundation. This will help prevent shifting and settling of the pavers.
What is the importance of applying joint sand to the pavers?
Applying joint sand to the pavers helps lock them in place, prevents weed growth, and improves the overall stability and durability of the patio.
Should I seal the pavers after installing them?
Sealing the pavers is an optional step, but it can help protect them from stains, fading, and weather damage. It also enhances the appearance of the patio.
You might also like